
Building Career Options and a Mentorship Program

Thanks to Christina from SkillDisplay for sharing!
Promoting your TYPO3 learning resources
Are you an ambitious content creator and have already written or are planning to write blog posts about TYPO3 resources that cover either TCCE, TCCI, or TCCD related topics? If you are, then finding channels to promote your learning resources can be a challenge. However, it can be easy to get another channel to promote your learning resources, because you are able to feature your content on the SkillDisplay platform now!
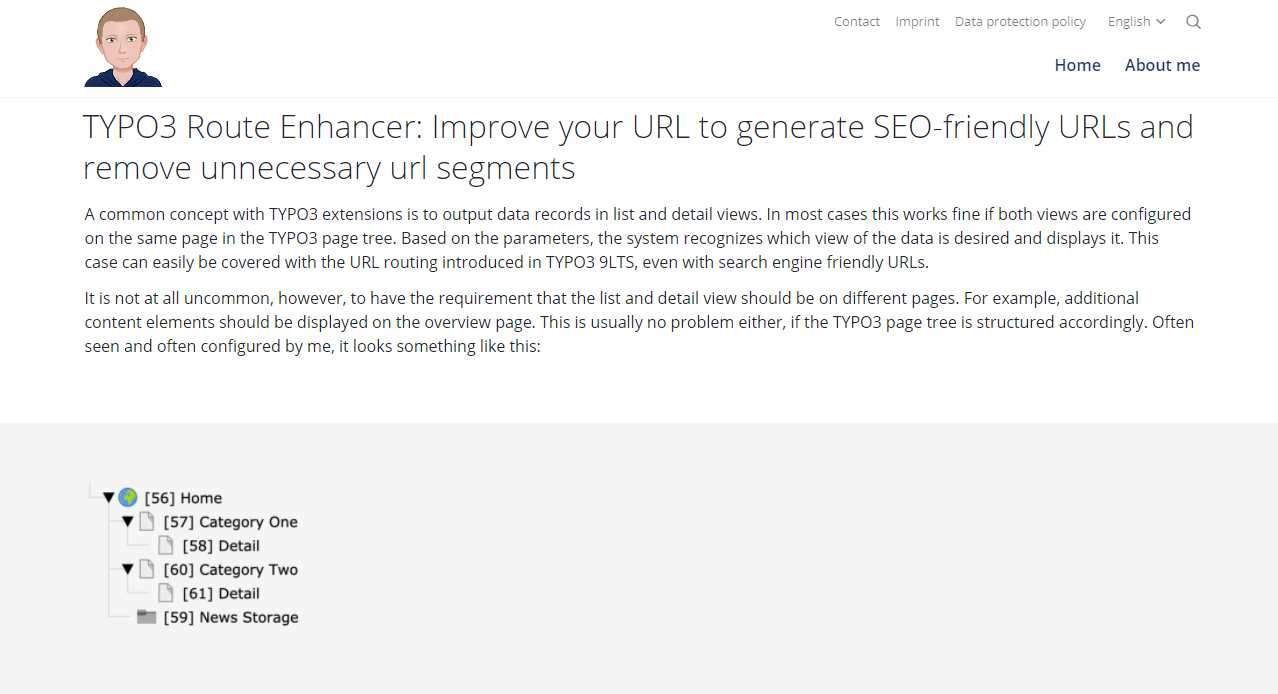
A section of the following blog post focuses on the “Route Enhancers” skill, with the learning resource “TYPO3 Route Enhancer: URL-Segmente unter Kontrolle” by Marc Willmann, F7 Media GmbH.
Topics covered in this blogpost include:
- Choose one or more skills
- Write the blogpost
- Setting up the SkillDisplay extension
- Using the extension
- Your own SkillSet on the platform
- Adding the Self Verification

Choose one or multiple skills
You can find skills you would like to write about or find matching skills to your already created learning resource by using the my.skilldisplay platform. Depending on the skill level, you can choose from Editor, Integrator, or Developer skills. Either type TCCE, TCCI, or TCCD into the search bar to get an overview of all available skills.
The Route Enhancers skill, which is part of the CMS Certified Developer 10 LTS SkillSet, was chosen, but you can also cover multiple skills at once if you want to.
Write the blogpost
You may want to consider the following points that are important when creating your learning resource:
- Know your target group: When writing a blog post, you should always consider your target audience. A blog entry for an Editor skill should have a lower level of expected pre-knowledge than resources for integrators or developers.
- Choose a title: When choosing a title for the blog post, it might be useful to name it similar to the skill(s) you are writing about, so people find it in the search bar.
- Content: Try to cover all points that are listed in the goals section. Your resource might be used by TYPO3 learners that are currently preparing for an official certificate.
- Visualization and examples: It is always good to use images that help explain your content or give code examples to make it easier to understand the content.
- SEO: When your blog entry is done, you should consider optimizing it for search engines. Learn more about this with the SEO (On-Page) and SEO (Technical) skills.
To get a good understanding on how to write an informative blog entry, you can read Marc’s blog entry (in German) here: TYPO3 Route Enhancer: URL-Segmente unter Kontrolle
Get a campaign ID
Send us a message on our service portal contact form and we will provide you with an account, your API key, and a campaign ID.
Your own SkillSet on the platform
Your learning resource has the same format as any other SkillSet. It will cover a description of your business account, the resource link you created and the skills covered.

Setting up the SkillDisplay extension
The SkillDisplay extension is available for TYPO3 and PHP. First you will need an API key.
The following steps need to be made for the setup on TYPO3:
1. Download the TYPO3 extension! You can find more information and the GitHub link on Packagist. We recommend using composer to require the extension.
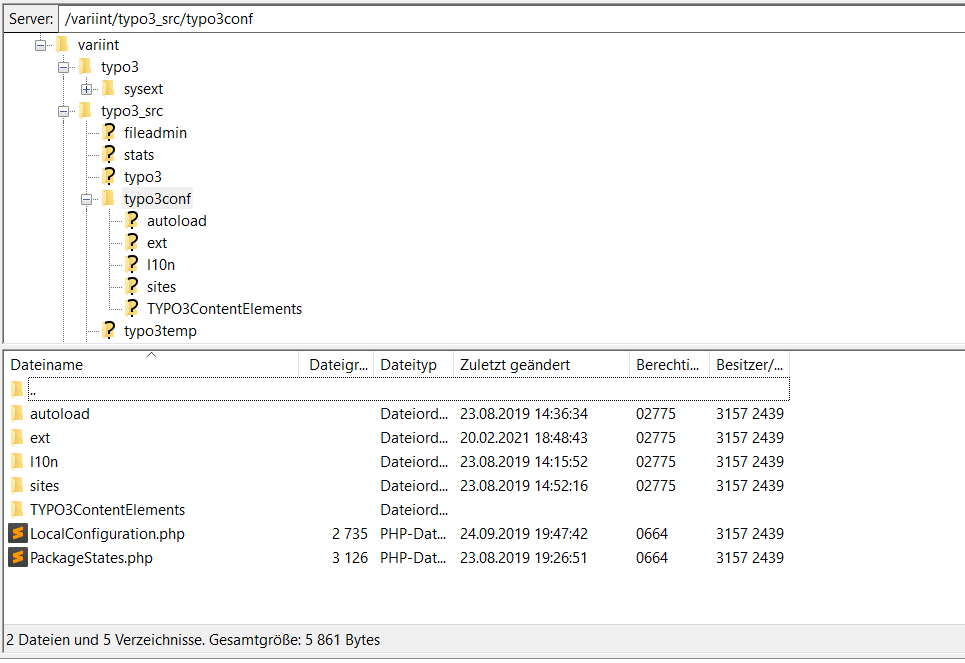
2. If you didn’t use composer - Copy the TYPO3ContentElements into the typo3conf directory on your server.

3. You should then see the SkillDisplay extension in the Extension tab. Make sure it is active!
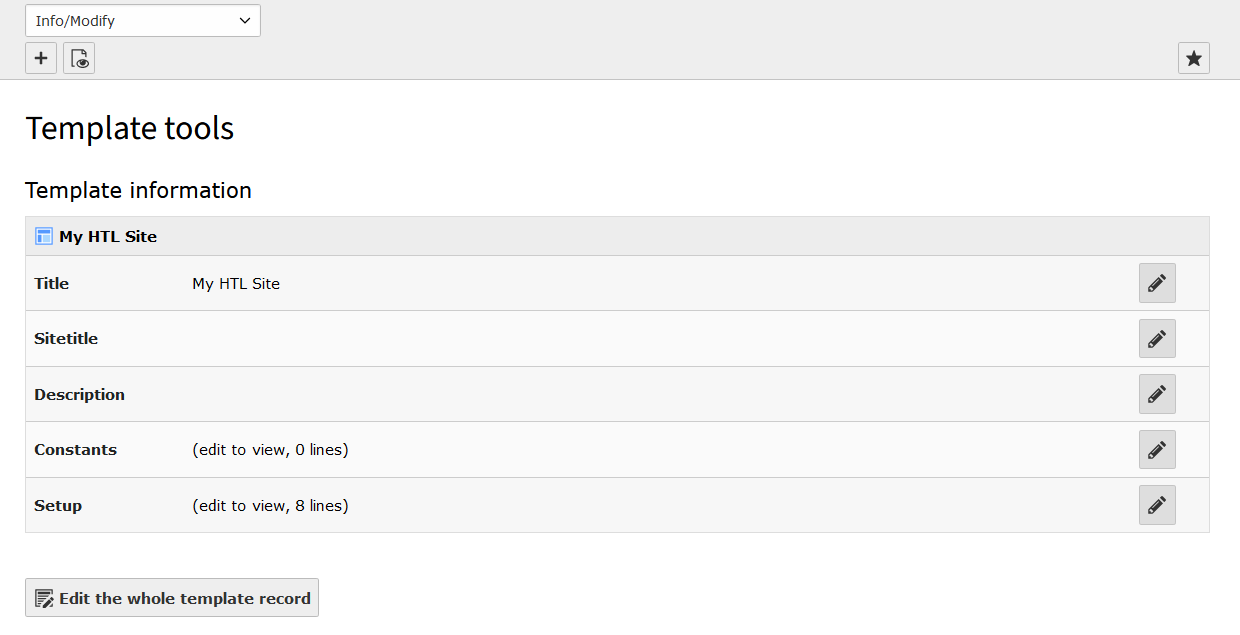
4. Edit the whole template record of your site.
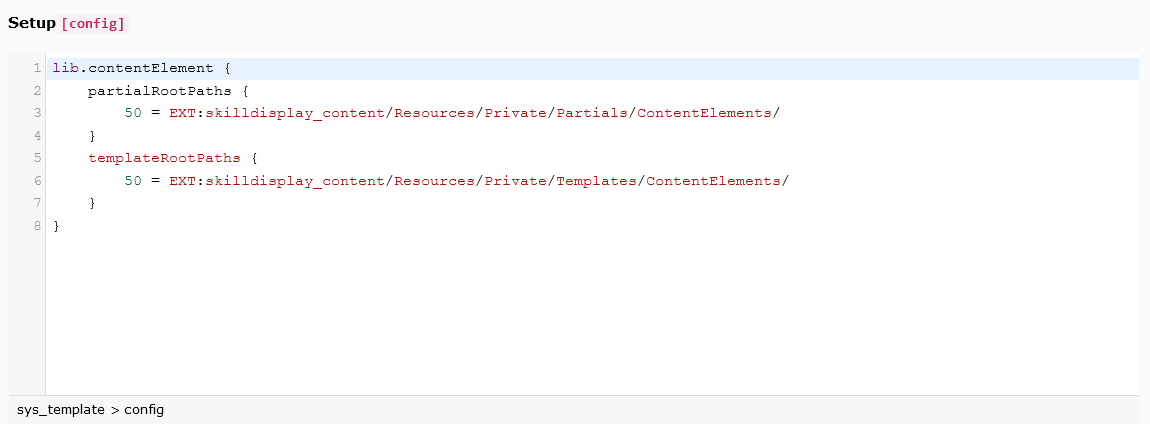
You need to add the following lines in the Setup field of the General tab. You can copy-paste the TypoScript code from the Packagist site.
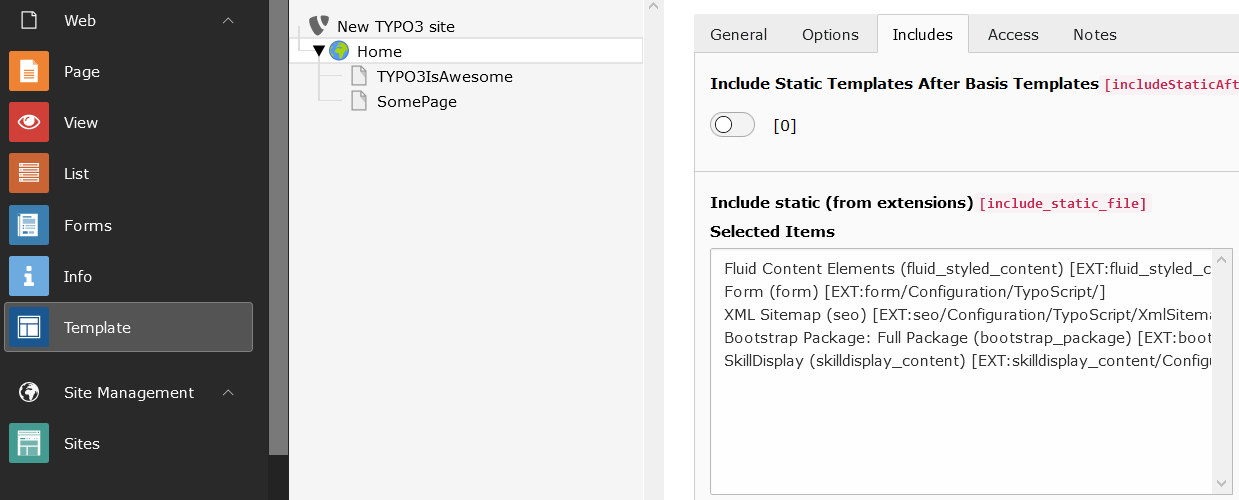
Also, you need to make sure, the SkillDisplay extension is in the Selected Items section!
Using the extension
Once the extension is set up, we of course also want to use it!
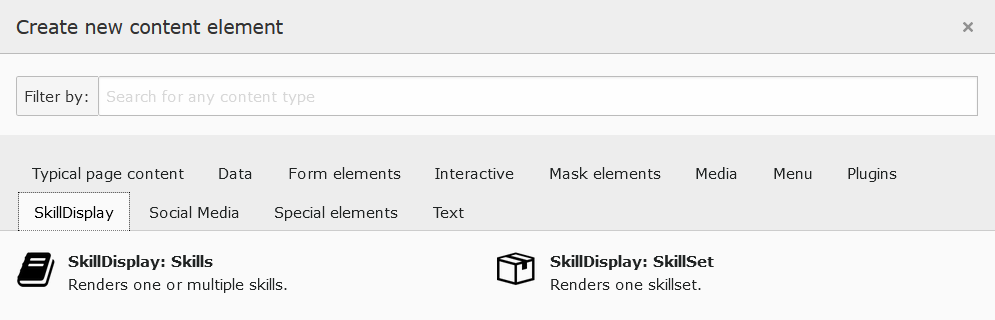
The goal is to display the self assessment button on your website. To do this, you need to create a new content element. You should be able to see the SkillDisplay tab and select the SkillDisplay: SkillSet element.
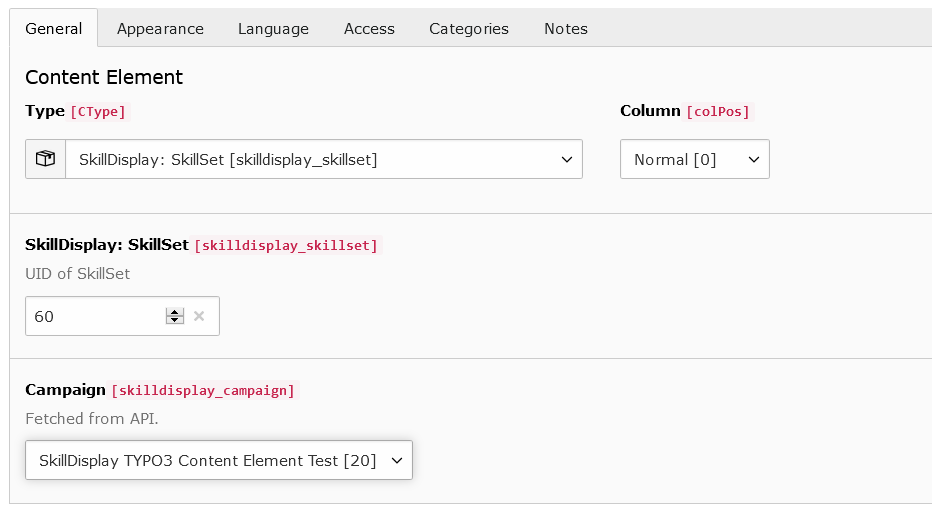
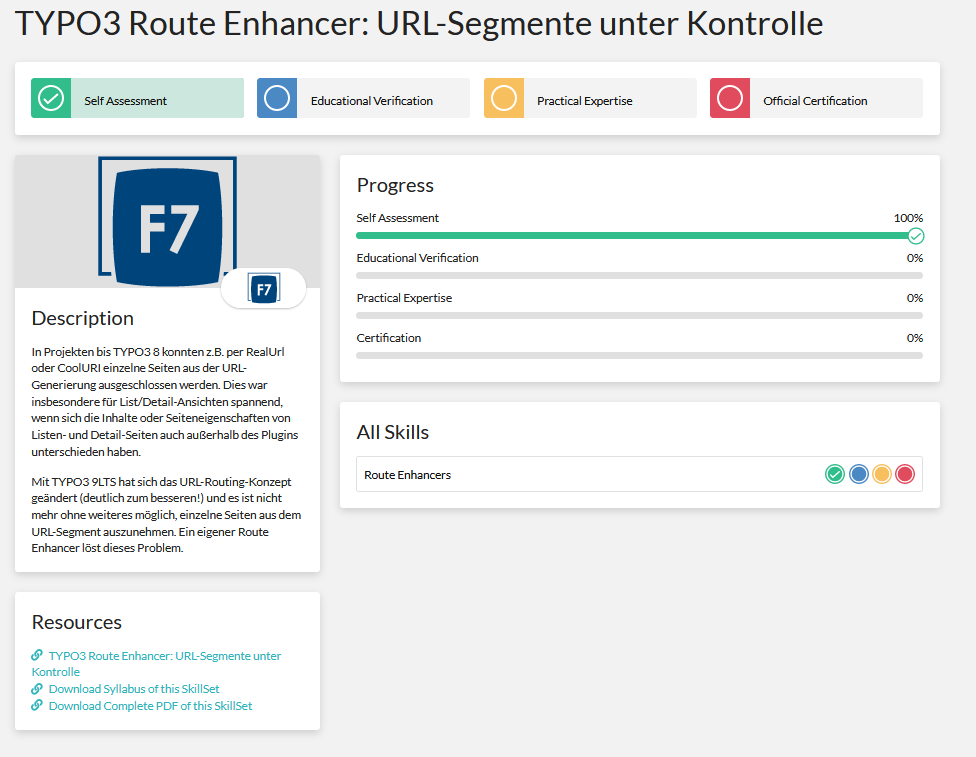
The UID of the SkillSet is part of the link on the SkillDisplay platform. In Marc’s case, this is ID 60: https://my.skilldisplay.eu/skillset/60

The result shows the name of the SkillSet, a link to the SkillSet, the logo of the SkillSet owner, the description, and a Self Assessment button which is connected to the SkillDisplay platform. The left image shows the result on your TYPO3 site and the right image shows the SkillSet on the SkillDisplay website.
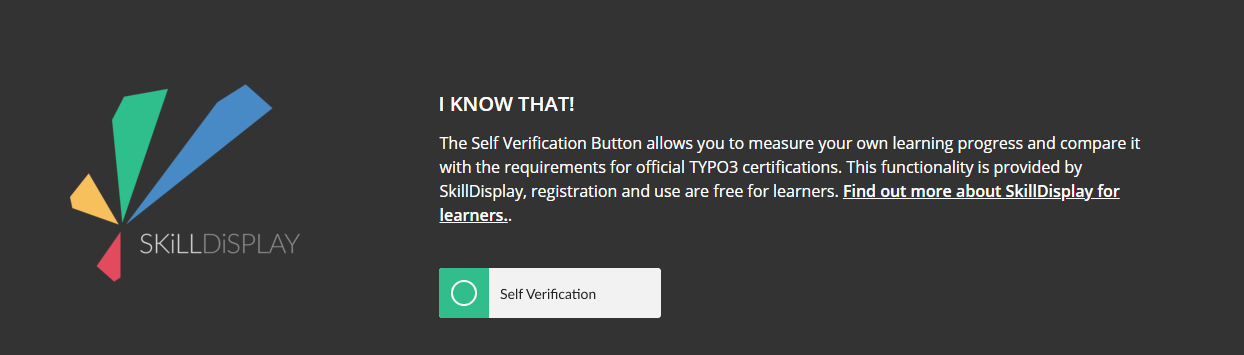
How you present the verification field on your website is your choice. The only required part is the Self Verification button itself. It might still be useful to explain to your audience what happens when pressing the mysterious button! In the following screenshot, you can see an example of Marc’s blog post!
Present your resource on SkillDisplay!
Now it’s your turn! Choose one or multiple skills, write your blog entry covering the topic and get in touch with the SkillDisplay team to get access for promoting it on the SkillDisplay platform.
