Tutorial: Report TYPO3 Issues and Test Patches
Once again: Thanks to Peter Kraume from bgm websolutions for sharing!
In Part 1 of this two-part series about testing new versions of TYPO3, I explained how to get a local TYPO3 v10 installation with no effort. I hope you already found some time to give TYPO3 v10 a try. Maybe you even set up your first production website with TYPO3 v10!
Have you ever stumbled across a bug or found a place that could use some fine-tuning? Today I will show you how to create a useful bug report and test patches.
This tutorial not only applies to TYPO3 v10 but the same steps apply anytime you find a bug in the TYPO3 core and want to report it. Here’s an outline of this tutorial:
- How to report an issue - an introduction to Forge and Forger
- How to pick and test a patch
- Use your local DDEV TYPO3 installation for patch testing
How to report an issue - an introduction to Forge and Forger
Step 1: Login to Forge
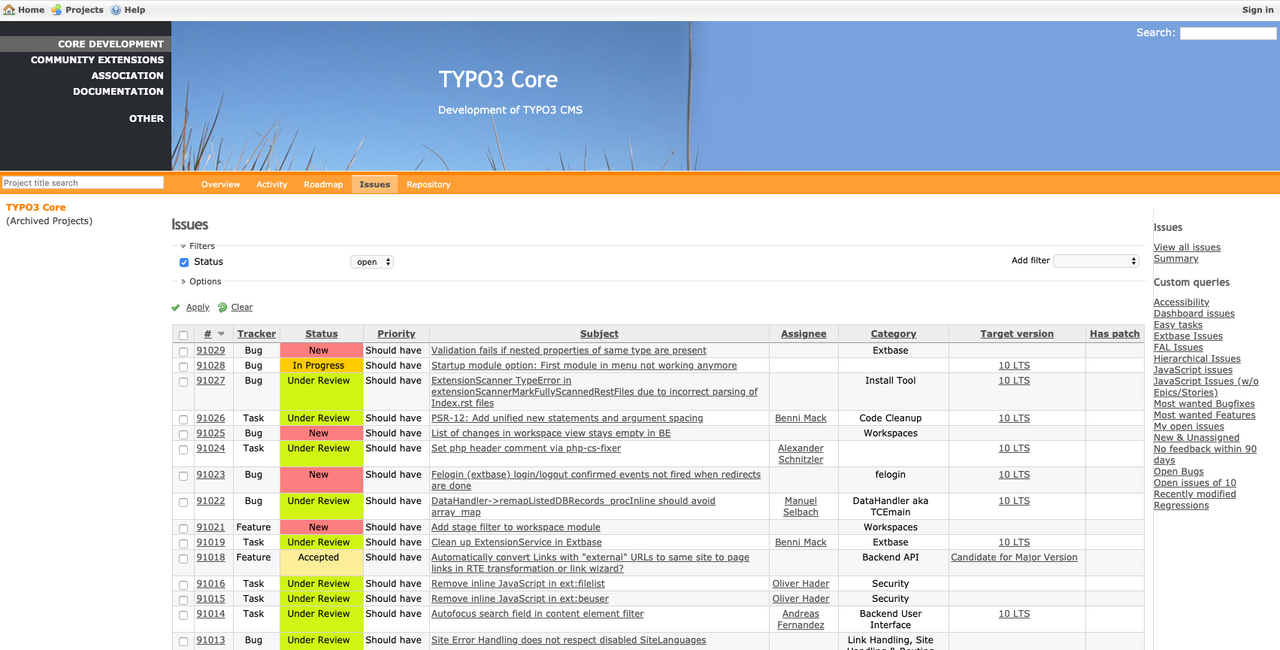
Our issue tracker is called Forge. To report an issue, you need a typo3.org account. If you don’t have one yet, get yourself an account here.
Forge is where people submit bug reports and contributors review, prioritize, and submit improvements. Each month their work is celebrated on Developer Appreciation Day.
Step 2: Search the issue tracker at Forger
Before you report a new issue search to see if your issue might have been reported already.
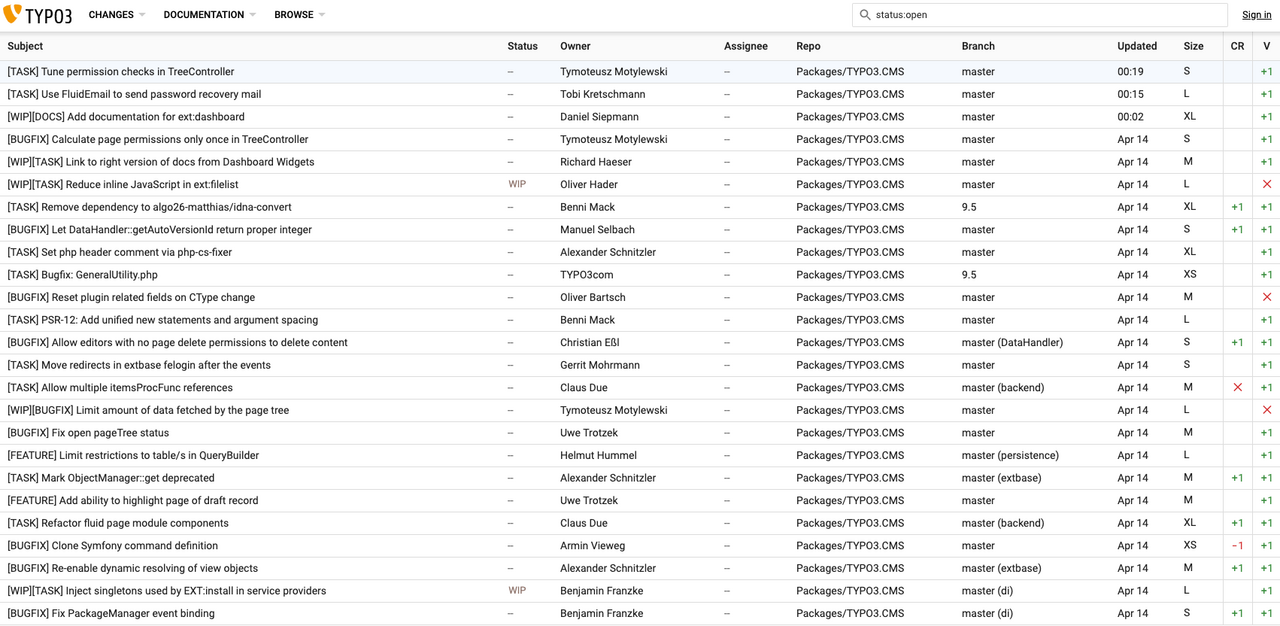
Visit Forger, which provides a searchable and visual overview of the activity over on Forge. Read more about Forger here.
Search tips:
- Use the filters to refine your search to TYPO3 version 10.
- Select “Closed Tickets” in the text box to include closed issues - as the bug may have already been reported and resolved.
Step 3: Create your issue
While preparing to write your issue, review these guidelines to ensure your issue is clear and helpful. Follow the steps explained in the documentation to “Report an issue.” Please make sure to read the best practices for writing a good bug report!
By the way: if you are in doubt if your report is really necessary, I'd rather have one more report than one too few. So don’t feel bad if your report is closed as a duplicate.
How to pick and test a patch
The TYPO3 code contribution workflow is based on patches and patchsets. A patch can be updated multiple times adding a new patchset on top.
To ensure every patch applied to the TYPO3 codebase meets the highest standards, every patch must be reviewed. Only after at least two people have tested the patch and at least two people have verified it (one of them must be a member of the core team), a patch can be merged.
As the issue reporter you will get an email notification once a patchset is uploaded for your issue (or if someone has questions or provides additional information). Once your report gets its first patchset, the status of the issue will change to “Under Review”.
The link in the comment to your report will take you to the TYPO3 review system which is called Gerrit. Gerrit is a web-based code review and project management tool for Git-based projects. Here you can find a short introduction, what Gerrit actually does.
If you want to test patches regularly I’d recommend you set up a proper TYPO3 development environment and then to cherry-pick it from the review system into your local git repository.
Use your local DDEV TYPO3 installation for patch testing
To make this easy, I recommend you use your local TYPO3 v10 installation based on DDEV. It’s perfect for testing! If anything goes wrong or breaks your whole installation, just kill the complete environment as described in step four of my first tutorial and start over.
Step 1: One-time preparation of your DDEV environment
To prepare everything for testing, open your favorite shell and run these commands:
ddev composer req cweagans/composer-patches
This installs a composer package to patch your TYPO3 installation with composer commands.
ddev composer config extra.composer-exit-on-patch-failure true
This command tells your composer patch command to stop if a patch cannot be applied.
mkdir patches
Downloads from Gerrit will be stored in your project folder named “patches”.
Step 2: Update your TYPO3 v10 test installation to apply the latest patches
Follow the procedures in Step 3 in Part 1. This will update your TYPO3 v10 test installation to apply the latest patches.
Step 3: Download and apply a patch
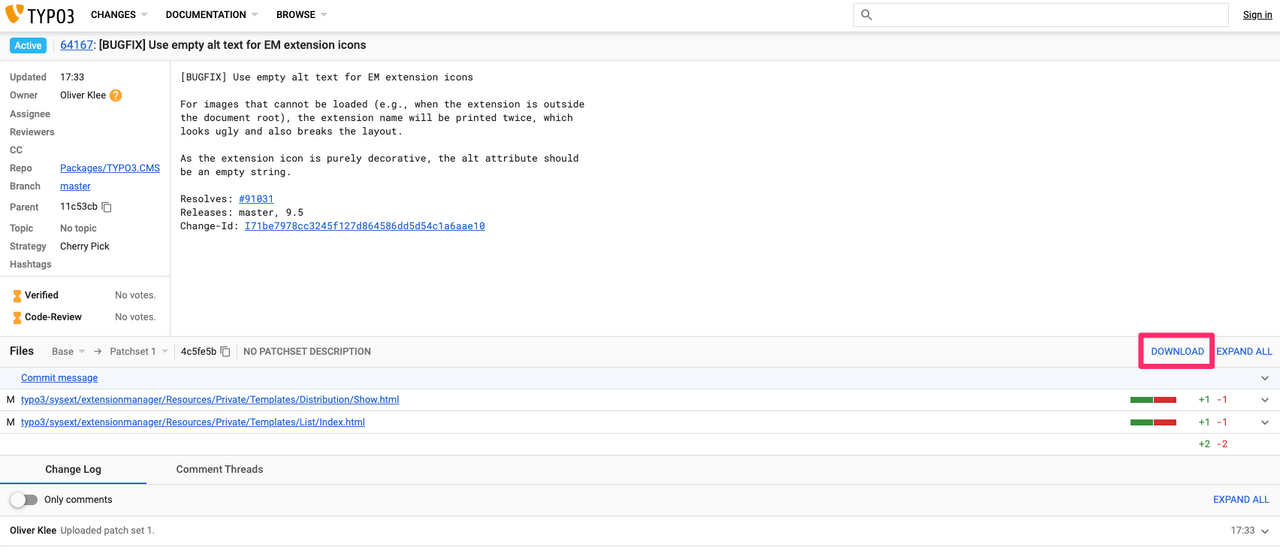
1. Pick your patch! Go to the detail page of a patch, e.g. https://review.typo3.org/c/Packages/TYPO3.CMS/+/64172
Please note: This patch has already been merged. It’s just an example! Obviously, it would be hard for me to give you an example of a particular patch that won’t be merged in the future. If you do attempt to apply a patch that’s already been merged, these steps won’t work. So follow the tips above to go find a new patch to test!
2. Next click the “Download” button on the right side and download the zip version of the patch.
3. On your local machine unzip the patch and move the diff file to the “patches” folder, which you’ve created in “Step 1: One-time preparation of your DDEV environment.”.
4. Open the patch file with an editor of your choice and determine which TYPO3 core package the patch is intended. Search for the typo3/sysext path. The following folder name is what we’re looking for. In this case “dashboard”.
Hooray, you did it! Now you can go ahead and test the patch!
Common pitfalls why applying the patch might fail:
- You’re too late and the patch you’ve chosen has already been merged and thus you’ve already fetched it via “ddev composer update”.
- You forgot the colon at the end of the “composer-exit-on-patch-failure” line in composer.json.
- There is any other validation error in your composer.json. Please check the error message in the shell output.
- The patch file is intended for multiple TYPO3 core packages. In this case, split the patch file manually for each package.
Step 4: Test the patch and add your review
Now that you’ve successfully applied a patch you can test it.
Please follow these guidelines to review a patch.
Step 5: Remove a patch
To clean things up, I’d recommend you remove the patch. This is to make sure you don’t get any strange errors or conflicts while you test the next patch.
- Remove patch entry from composer.json
rm -rf public/typo3/ && composer install
(removing just the modified core package(s) is sufficient as well)- Optional: remove the patch file from the “patches” folder
You’re now a patch testing Jedi!
I hope this tutorial motivated you to test TYPO3 core patches. Please keep in mind that this way to test patches I’ve described here is not the optimal way to go but a hopefully easy one.
If you want to dive deeper into core development, please check the whole TYPO3 Contribution Guide for Core Development.
Did you like this tutorial? Was it easy to understand? Please provide feedback if you think something is missing or unclear in this article. Every kind of feedback is appreciated very much!
Acknowledgements
My two blog posts wouldn’t have been possible without the help of many people. Special thanks go to Georg Ringer and Daniel Siepmann for the technical review, Heather McNamee for copy editing and Julian Böhm for putting everything online!


