
Getting Started With TYPO3 CMS

Getting Started With TYPO3 CMS: A Step-by-Step Introduction
Whether you're new to TYPO3 or perhaps you’ve used in the past, this short guide is the ideal starting point. In this guide we’re going to introduce some TYPO3 concepts, then look at how we log in and navigate TYPO3’s backend. Next,we'll look at how we go about storing files such as images and documents. we’ll turn our attention to how we create pages and add content to an existing TYPO3 installation.

TYPO3 Concepts: Frontend & Backend
The Backend
The backend's primary role is to enable users to create and publish both pages and content for visitors to access.
The backend is also used to manage a TYPO3 installation. Domains, languages and other information that determine how a site behaves is also managed in the backend.
Tasks such as creating forms, adding backend users and managing third-party extensions also take place in the backend.
Your access permission determines what you can see and do in the backend.
The Frontend
TYPO3 uses the Fluid Templating Engine, which acts as the glue between user generated content such as pages and blog posts and our design templates. To make it easier to position and structure content in the backend, TYPO3 uses backend layouts.
To manage our design templates, TYPO3 uses sitepackages.
Sitepackages exist as a stand alone package that is used to store a project's html templates, css and javascript files as well as other assets such as fonts and images.

Logging in to TYPO3
Accessing TYPO3’s backend:
Open your browser and navigate to your domain followed by /typo3. For example: www.yourdomain.com/typo3.
Enter your username and password.
- If enabled, complete any additional security steps for multifactor authentication.
Note: this is the default entry point for a TYPO3 installation. With newer versions of TYPO3 it is now possible to change the entry point from /typo3 to something else. It could be www.yourdomain.com/anything-you-want or even a subdomain https://cms-access.yourdomain.com
Once logged in, you’ll be presented with the backend.

Introducing the Backend
The TYPO3 backend is your control center, designed for usability with clear navigation and modular tools:
- Top Bar: Access personal settings, search functionality, and notifications.
- Module Menu: Located on the left, this menu provides access to essential tools like Filelist, Pages, and Extensions.
- Workspace Area: The main section where you create and edit content.
Updating your user profile
From the Top Bar we can perform a number of tasks including:
- Managing our user profile,
- Accessing system notifications
- Viewing system information
- Accessing the internal search tool
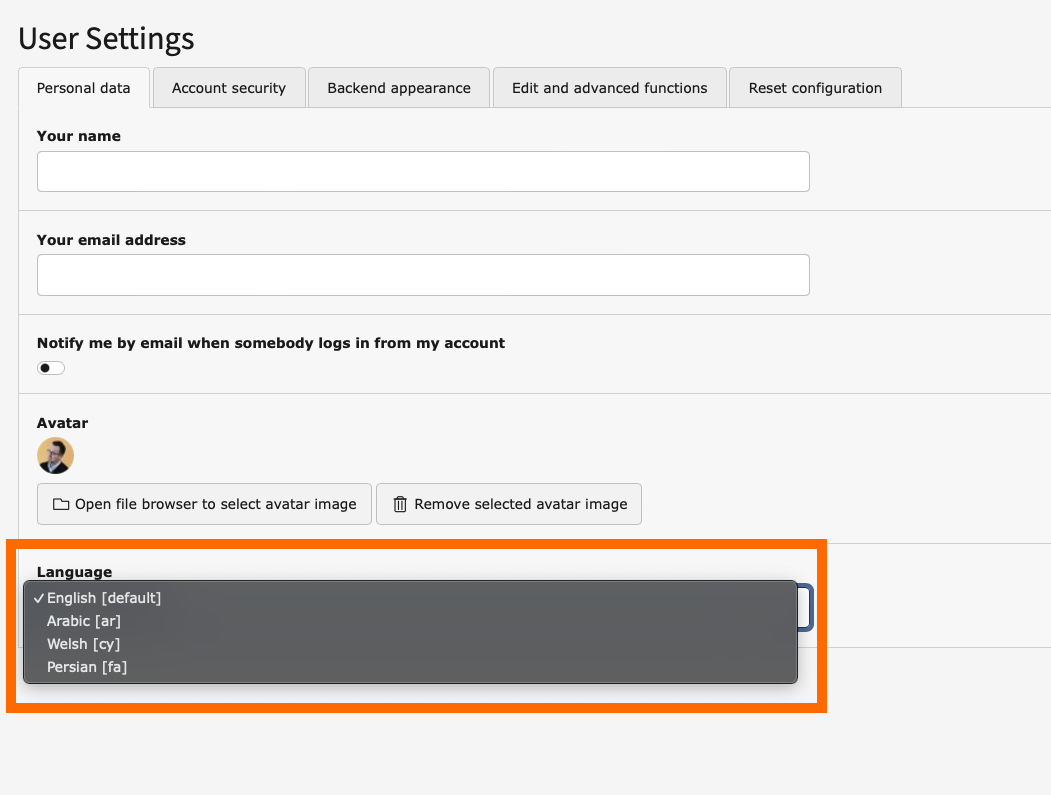
To access the User Settings menu, select your user name on the top right hand corner and from the menu select User Settings.
Note: that from here you can also switch between light and dark mode.

From this stage, I can change a number of things—all of which are related to my own account, e.g., my personal details like my name, email address, and avatar
I can also change the language of the backend from my user profile. My installation includes additional languages, allowing me to easily switch and work in the backend in a different language if needed.

Changing your password
You can change your password from the Account Security tab.

Search
The search tool, located in the Top Bar is used to search for records in your TYPO3 site. This includes pages, content elements and other records that are stored in your installation’s database.
You can also use the keyboard shortcut Cmd/Ctrl + K to access the search tool from anywhere in the backend.

Working with Documents and Images
The Filelist module is your hub for organizing assets that includes images, documents, and other files.
- Structure files into folders for easy access.
- Upload, rename, and move files directly within the Filelist module.
- Preview images using the tiles view.
In the example below, I have two separate filemounts. One is used to store Documents and the other is used to store images.

Creating Pages and Content
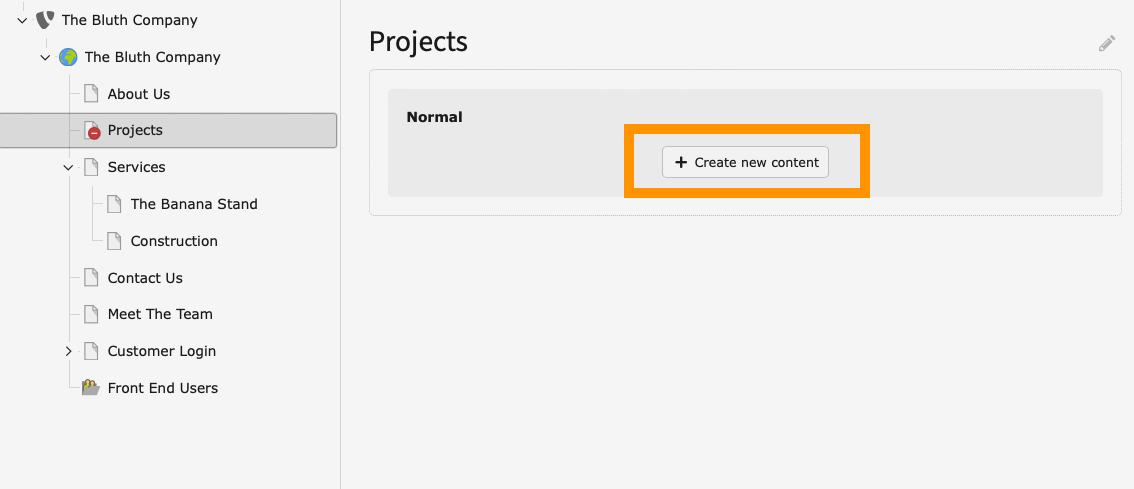
The first thing you will notice when loading the Page module is the page tree.
The page tree is a hierarchical list of all the pages in our site, the page tree also serves as a sort of container for items, such as News Stories, Blog posts and in this example, front end user records.
Notice that I have five pages at the top level of my site, About, Service, Contact, Meet The Team and Customer Login.

And when I view my site in the frontend, we see the same five pages in the same order. And that's because our main menu is set up, by default, to match the structure of our page tree.

Creating new pages in the Page Tree
To create or add a new page to my tree, I drag the create new icon down to where I'd like the new page to exist. In my example I want the new page to be places next to the About Us page.
Note: whenever a new page is created, it is disabled by default. This means that we can modify the page and begin to add content to it. But it will not be visible in the Frontend and visitors will not be able to view the new page until we enable it. To enable a page, right click on it and select "Enable."

Moving Pages
If we want to move a page and place it somewhere else in the Page Tree. We drag the icon for our page and place it somewhere else in the Page Tree.
Adding Content to a Page
Content can be any number of things, it could be a block of text, an image or it could be a web form for your visitors to fill out.
Each of these different types of content exist as content elements in TYPO3. And if we want to add some text and images to my new page, I need to use the appropriate content element.

In my example, I want to paste in some text and use an image that I uploaded to my Images Filemount.
To do this, select the "Text" tab on the left hand side and then select the "Text & Images" content element.

Adding a header and text
I start by adding a header to my content element.

I then paste my content in to the Rich Text Editor (RTE).

Selecting an image
To add an image, select the Images tab and selec the Add Image button. You can either choose to select an existing image that has already been uploaded to the Filelist or module or you can upload a new image directly.

You can either choose to select an existing image that has already been uploaded to the Filelist module or you can upload a new image directly.

Once you've selected an image, you can choose where you want to positon the image relative to the text.

View your changes
We now have a new Projects page with a single "Text & Images" content element on it. Once we are happy with our work:
- Right click on the Projects page icon and select "Enable"
- Then right click again on the page and select "Show"
Next steps
Now that we've covered the basics, here are some resource to help you make the most out of TYPO3.
The Editors Guide covers a range of tasks including working with the page tree, publishing content and more.
The TYPO3 Getting Started Guide talks you through the entire process of installaing TYPO3 and building it out your design templates.
get.typo3.org has detailed information about each of the supported versions of TYPO3, system requirements and information ELTS releases.
