Feature Highlight: TYPO3 Forms Are Quick and Customizable
Websites need forms more often than you’d think. TYPO3 CMS makes it easy to set up forms and interact with your site’s visitors.
With some CMSs you have to install extensions or plugins to gather information from your website visitors. In TYPO3 it’s part of the core. Whether you’re launching a limited-time user survey or need a consistent way to gather payment information, TYPO3 makes it easy to create custom forms. With TYPO3 Forms you can:
- Create forms from templates
- Create forms from scratch
- Add multiple steps to your form
- Add finishing touches to your forms
- Embed forms in your website
- Integrate with powerful extensions
And if you want to see other TYPO3 features in action, we have longer more in-depth tutorials on the TYPO3 YouTube channel.
Create forms from templates
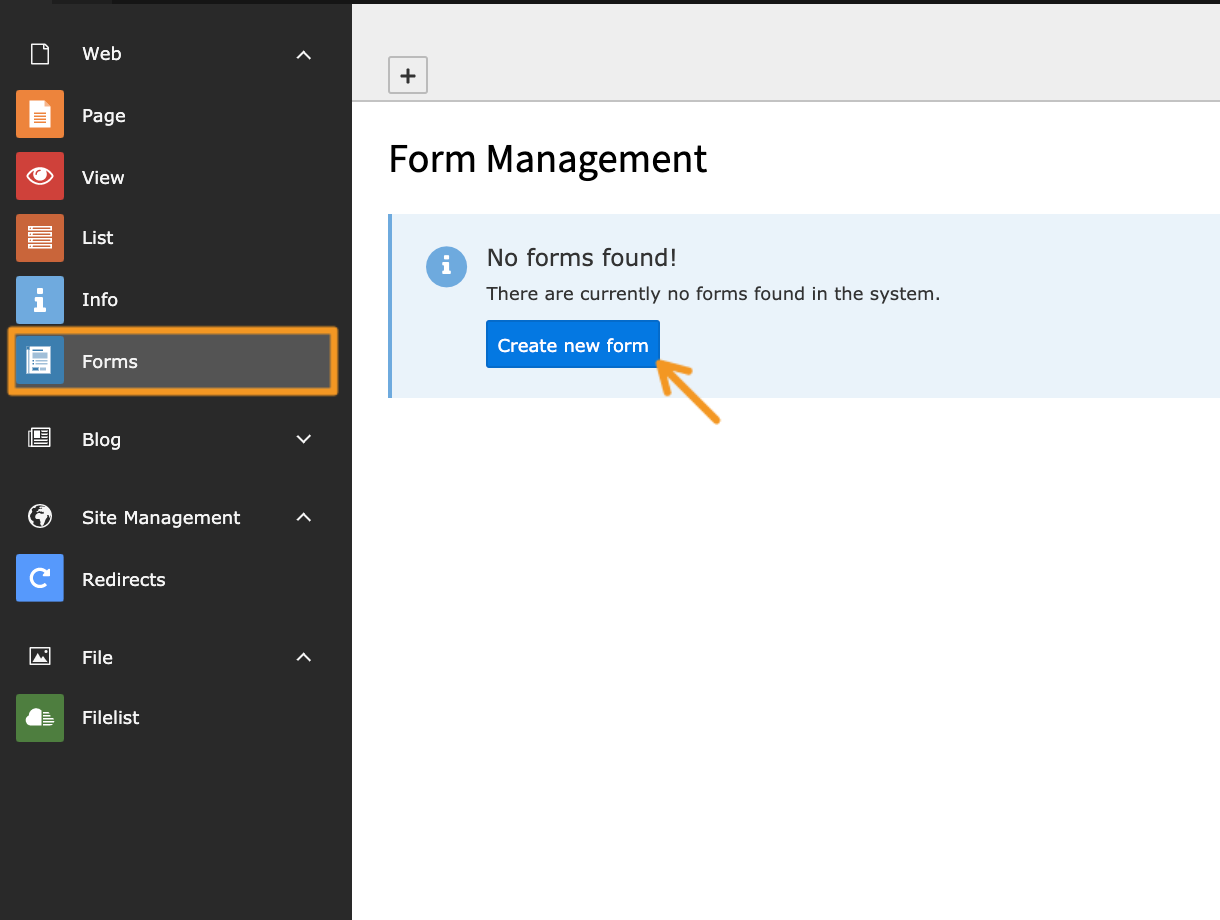
TYPO3 provides a guided interface for editors to create forms. Before you create your first form, your admin will need to have added the TYPO3 Forms extension. Once they do you can click on the “Forms” module in the left-hand menu, and select the “Create new form” button to begin.
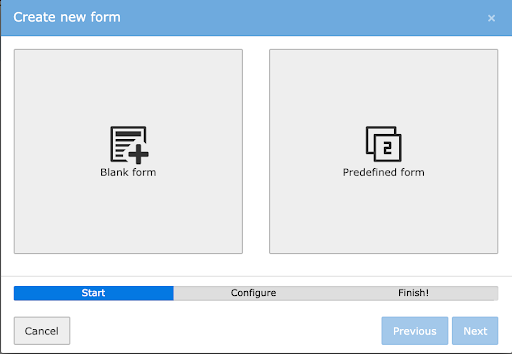
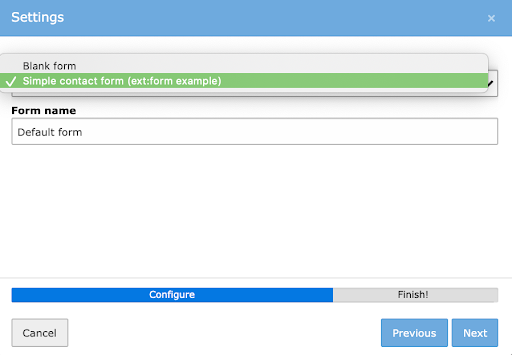
A wizard will give you two options: begin with a blank form or start with a predefined form. If you know you only want basic contact information or website visitors to be able to message you, we recommend going with the predefined form (you can still customize details later).
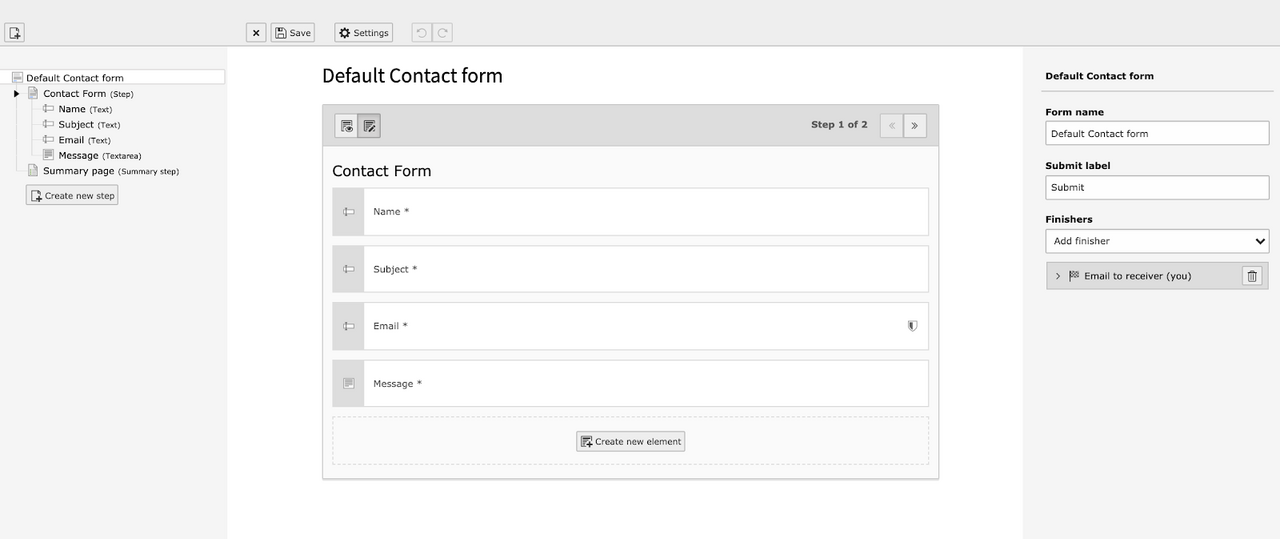
A predefined form, like the “Default Contact form” below, will come with predefined settings. You can still edit these settings or add fields, so you can think of these templates as a head-start on creating your form.
Create forms from scratch
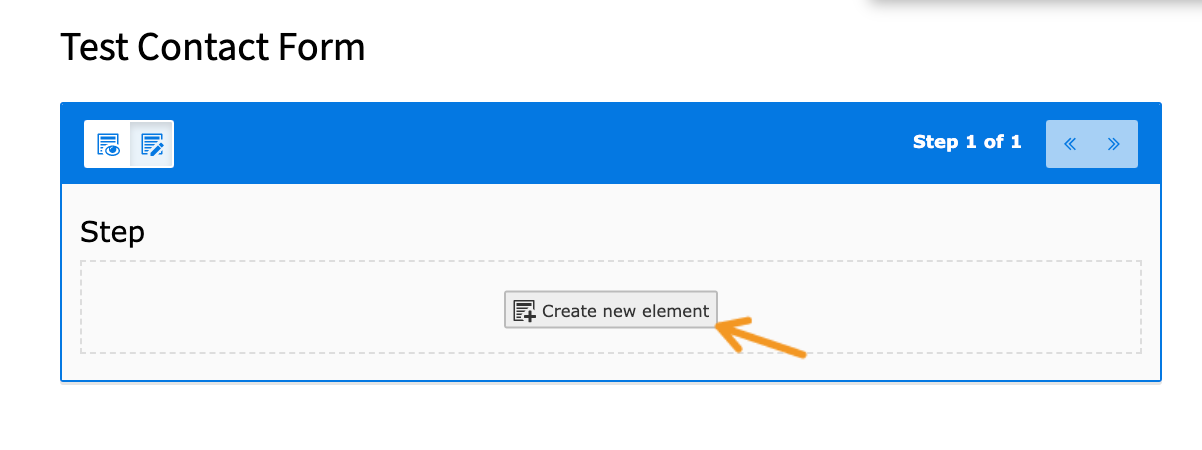
If you want to start fresh, TYPO3 allows you to create forms from scratch. Begin with a blank form and add your first field by selecting “Create new element”.
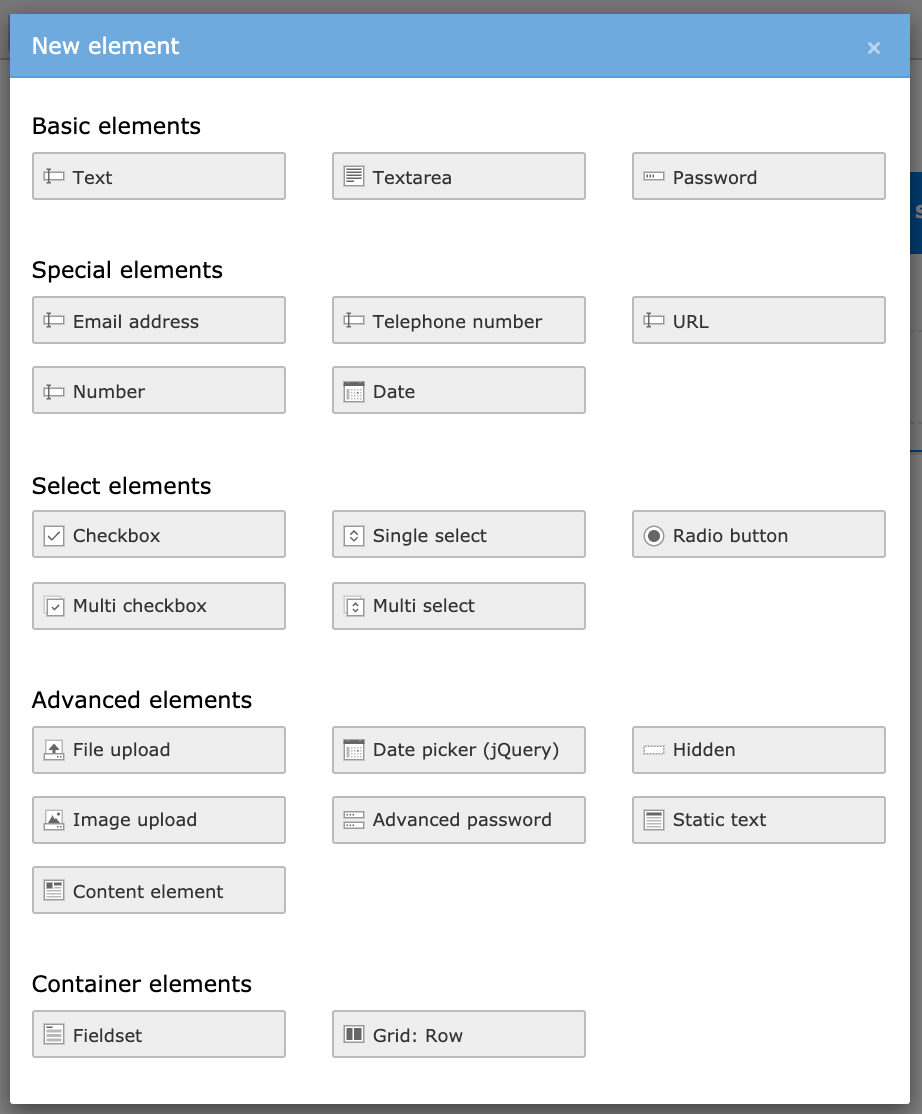
TYPO3 comes with over twenty form fields, by default, including:
- Basic elements, like text or password fields
- Special elements requiring specific format validation, like phone numbers or dates
- Select elements, like checkboxes or multiple choice
- Advanced elements that have special rules, like user uploads or calendar date pickers
- Container elements to visually organize your survey
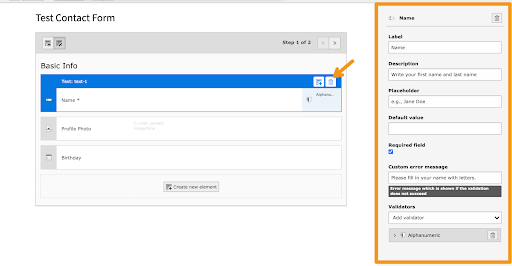
Once you’ve selected a form element, you can customize the settings for how the field is displayed and collected. Fill out the information in the pane that appears on the right-hand side of your screen. For a simple text field, for example, you have the option to fill in the following fields:
- Label: the title of the form field
- Description: instructions for how a user should respond to this field
- Placeholder: an example that will sit in the form field, until a user types
- Default value: to be filled in if you have a default answer, “i.e. N/A”
- Required field: check to require responses
- Custom error message: message shown if the format is invalid or a user fails to respond to a required field
- Validators: checks you can put on the answer so that a user follows the correct format
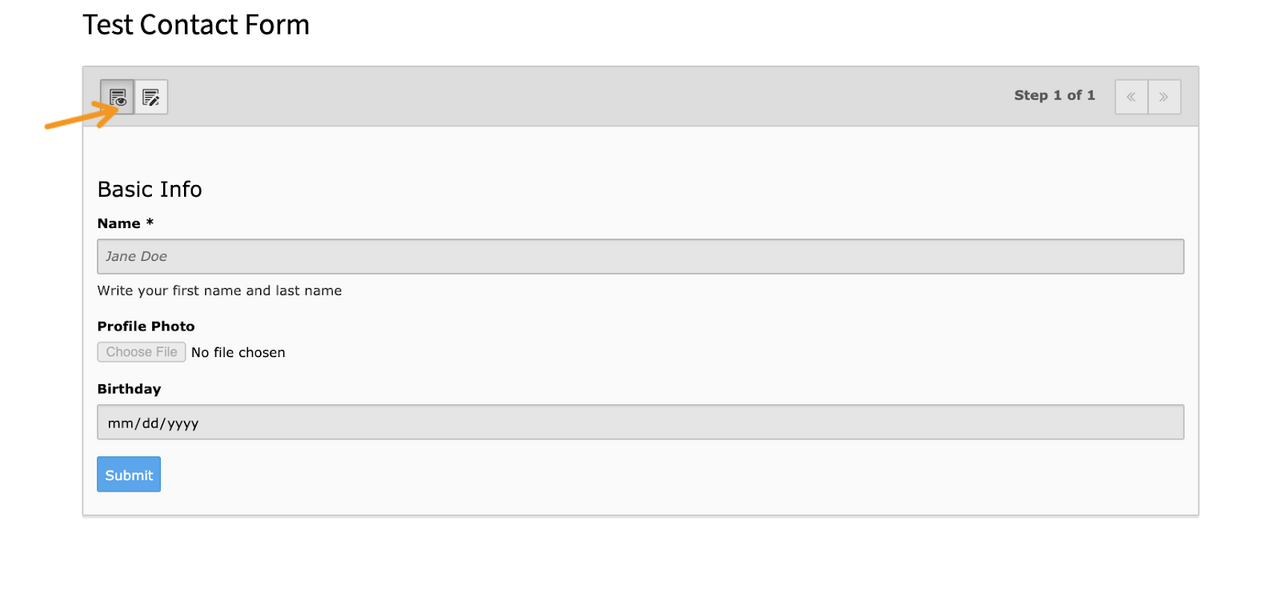
You can then preview what your form will look like to your website visitors by clicking on the ‘Preview mode’ icon in the top right corner.
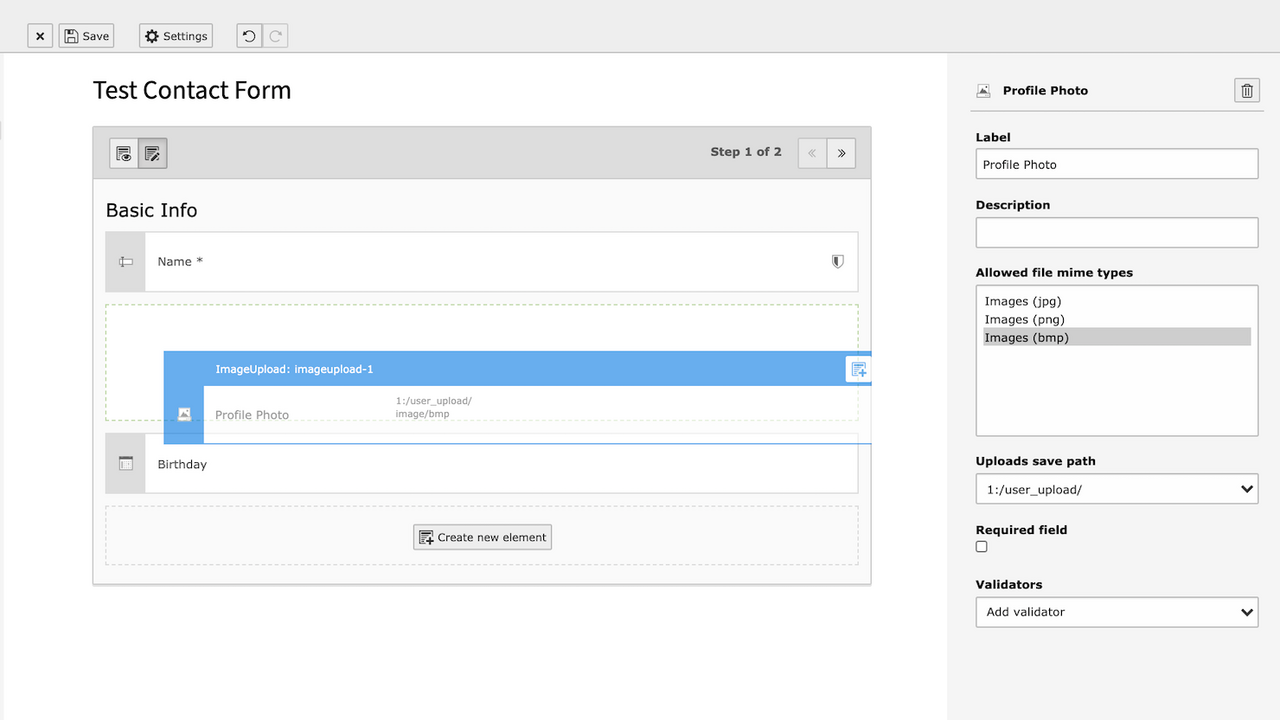
To rearrange the order of your form elements, select an element then drag-and-drop it to your desired location.
Add multiple steps to your forms
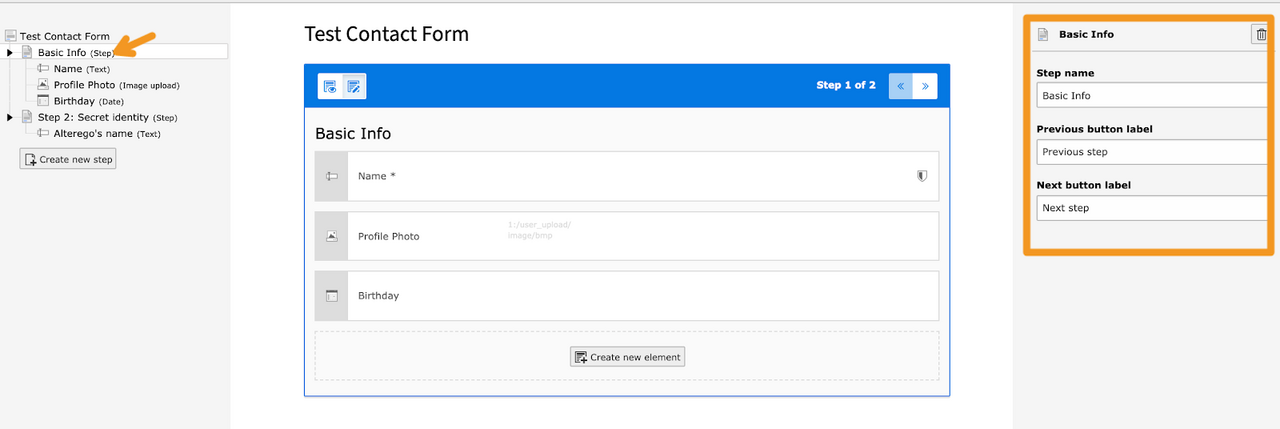
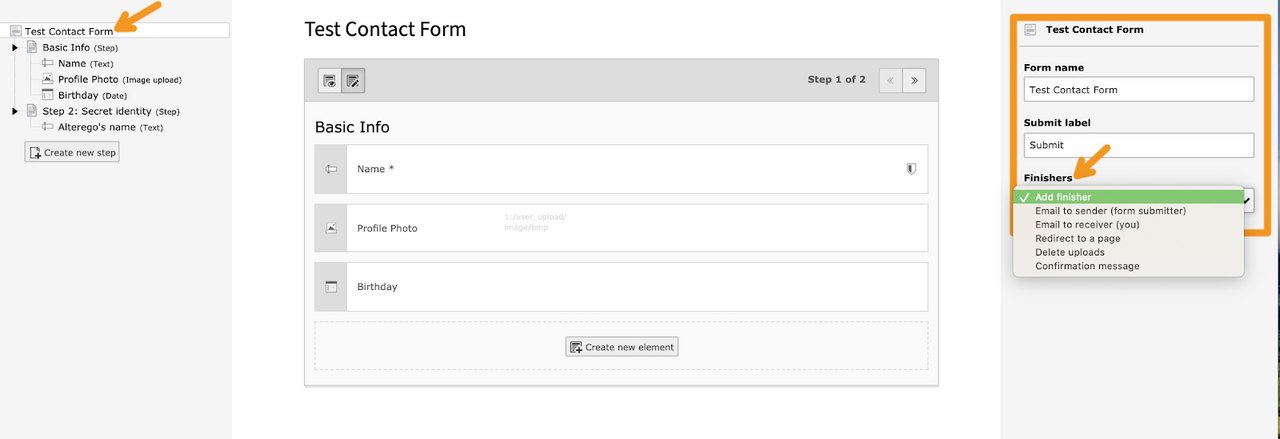
While some simple forms, like a “Message us” form, might only have one stage, other forms require multiple stages to collect information (think of a payment flow, where you collect shipping addresses and billing information in separate steps). In TYPO3 you can add multiple steps to your forms, and even name the steps as you go. Click on the step of the form on the left-hand side then fill out the basic info, including the title of the step, and labels for the “previous” and “next” buttons.
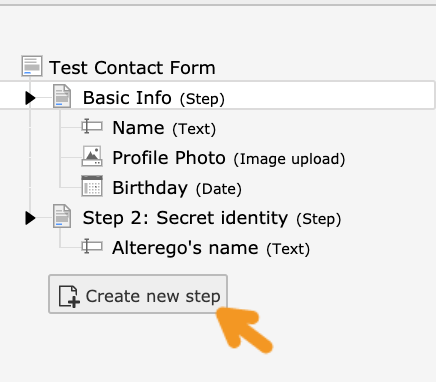
Add new steps by clicking on the “Create new step” button in the left-hand menu.
Add finishing touches to your forms
Once you've designed the steps and added the fields to your form, think about what you want to happen when the visitor clicks the submit button. For example, you might want to display a confirmation message so they don’t submit again or you might want to redirect them to another related page. You can specify this behavior by clicking on the form title at the top of the right-hand menu. Add “finishers” to the form, including:
- Email to sender (form submitter)
- Email to receiver
- Redirect to a page
- Delete uploads
- Confirmation message
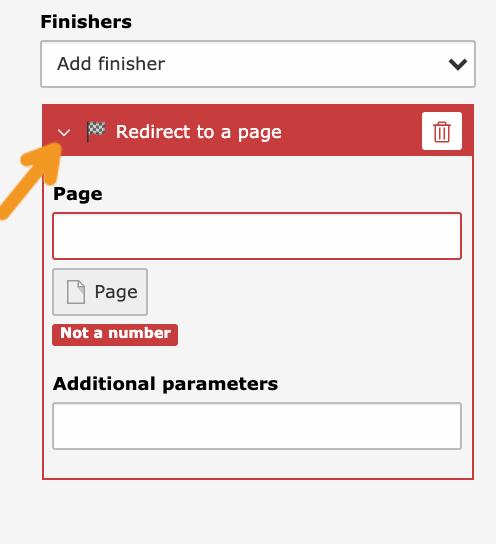
When you add a finisher, click on the “down” carat to expand it and configure the settings. Your form won’t be considered validated if the finisher is highlighted in red and missing information.
Embed forms in your website
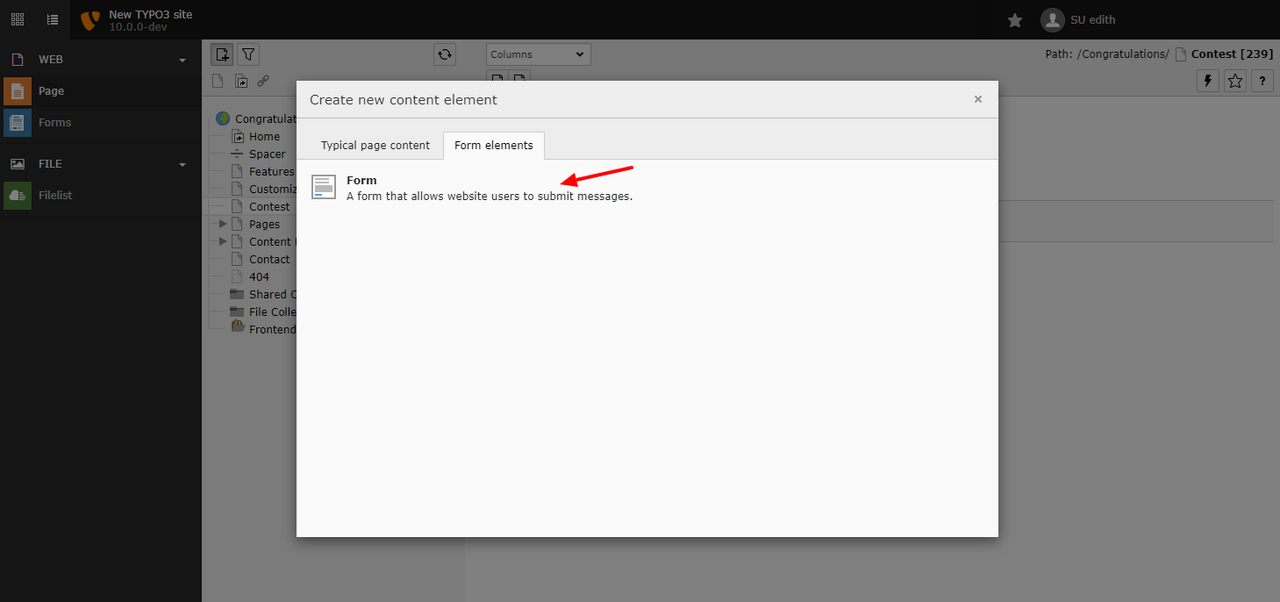
Once you’ve created your form, inserting one on your website is as easy as adding any content elements to your page. Simply add the “Form” content element and choose where it should go on the page.
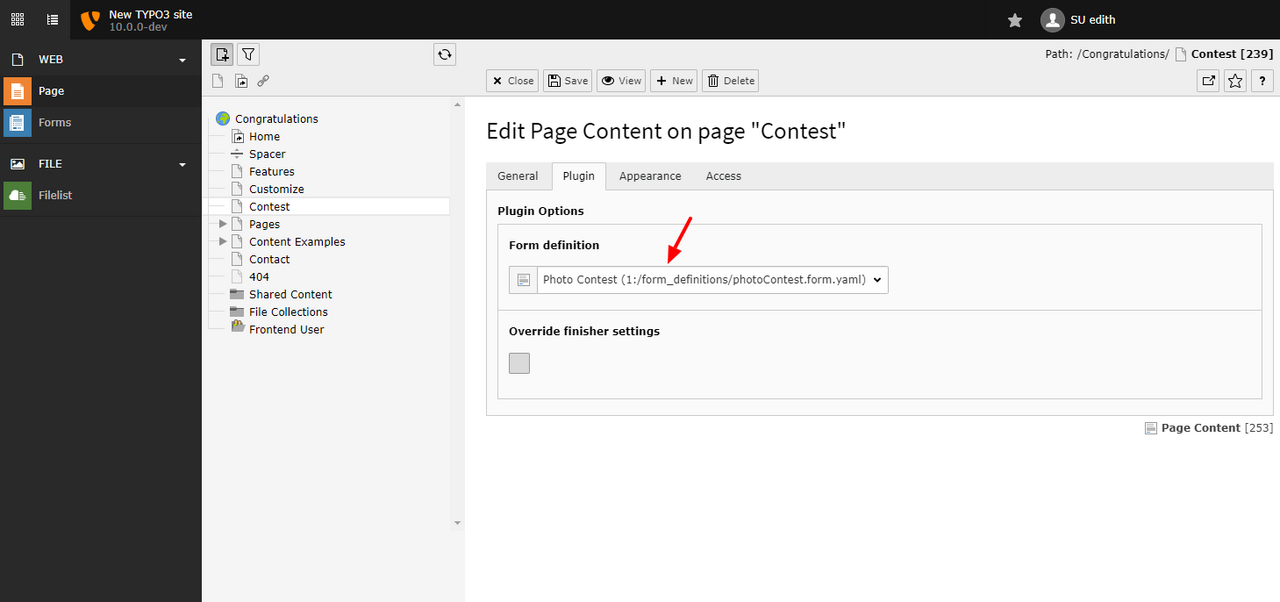
Then you can select which form to use from the “Form definition” dropdown menu under the “Plugin” tab.Then you can select which form to use from the “Form definition” dropdown menu under the “Plugin” tab.
Integrate with powerful extensions
If you get to the point where you’re running a complicated sales operation, you might need to expand the power of your forms. In TYPO3 it’s easy to integrate extensions with existing forms. If you integrate with Mautic, for example, any changes to a TYPO3 form will update the same form in Mautic creating seamless lead tracking.
Upgrade to get the most out of TYPO3 forms
TYPO3 has a lot of great form features with email responses and a more intuitive form builder, it’s gotten even better in the latest versions. If you have an older version of TYPO3, consider upgrading to the latest version. In the meantime, look out for new updates and tutorials on the TYPO3 YouTube channel.

