
Feature Highlight: Automate Publishing in TYPO3

The ability to schedule content is a must-have feature for any modern CMS. TYPO3 has auto-publishing and auto-expiration settings, so you can rest assured that your content goes up (and comes down) as planned.
Website editors have enough to manage without setting alarms or staying up late to make sure their content gets published on time. That’s why, in TYPO3, automated publishing comes out of the box. Read on to learn about TYPO3’s publishing features, which allow you to:
- Limit page visibility before publishing
- Schedule publish dates in advance
- Set expiration dates for content elements and pages
- Enable visibility for specific content elements
- Tweak page and content access rights for specific user groups
If you have any questions after reading, feel free to reach out to members of the TYPO3 community on Slack.
Limit page visibility before publishing
All your publishing settings are controlled in the page properties. In the Web > Page module, click the 'Edit page properties' pencil icon for any page, then go to the Access tab.
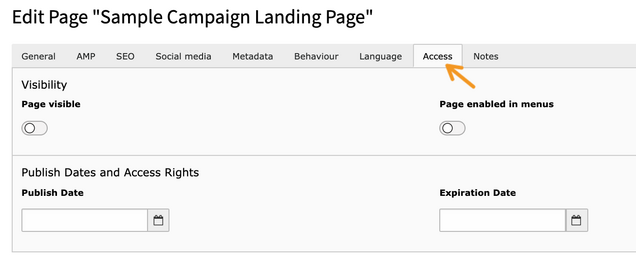
Sliders allow you to toggle page visibility settings. Here’s what the settings mean:
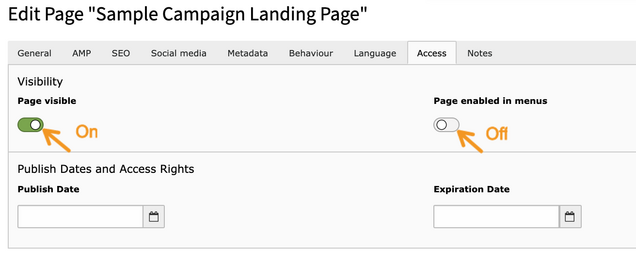
- Page visible controls whether a page is accessible to website visitors. When this setting is off, visitors will see an error message or be redirected if they navigate directly to the page URL.
- Page enabled in menus controls whether the title of the page is displayed in your website’s menu navigation. Turn this setting off to hide the page from the menu (though if page visibility is on, front-end users can still navigate to the page).
Schedule publish dates in advance
Let’s say you’re working on a new landing page for a holiday, seasonal, or anniversary campaign that you need to go live at midnight on a certain date. Rather than toggle page visibility on exactly when the page needs to go out, which might be the early morning hours, you can set a “Publish Date” ahead of time and your post will automatically be published on that date. You can even set the specific hour and minute you want it published (on a 24-hour clock).

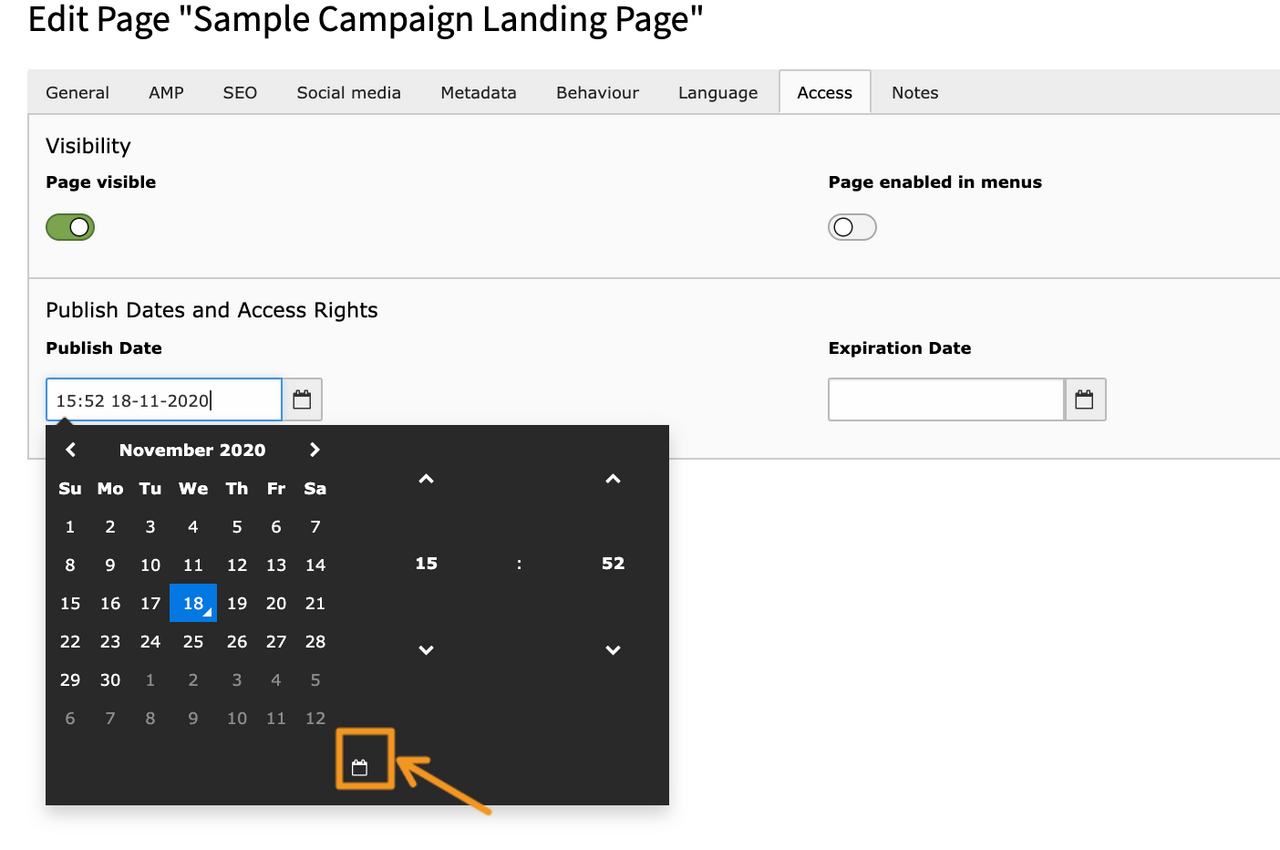
If you’re scheduling a post for a date in the future, make sure to turn page visibility on. It won’t be available to front-end users until the defined publish date.
A quick tip: to set the publish date to “right now”, click the calendar icon at the bottom of the calendar selector.
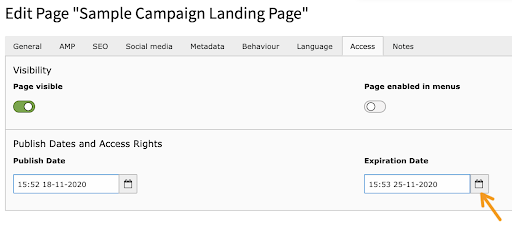
Schedule expiration for pages in advance
Sometimes you’ll have content or pages on a site that you only need for a short time like a special promotion page or a limited-time survey. In those cases, TYPO3 allows you to set an expiration date for your content. The process is the same for setting a publish date. After your page has passed its expiration date, visitors will no longer be able to access it.
One of the great things about this feature is that you don’t have to delete the page to unpublish content— so if you need a temporary page to go live again, all you have to do is edit the dates.
Set visibility for specific content
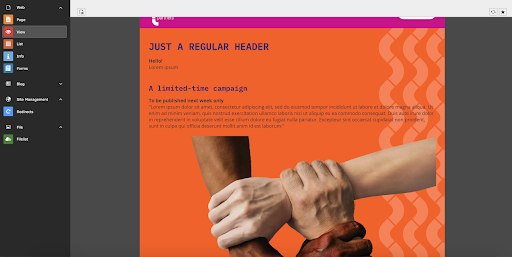
In addition to pages, you can toggle visibility and publish dates for specific content elements. Let’s say you have a limited-time campaign element—like an “Our company just turned 5 years old” announcement or a special sale promotion—which you want to publish on one of your website’s landing pages.
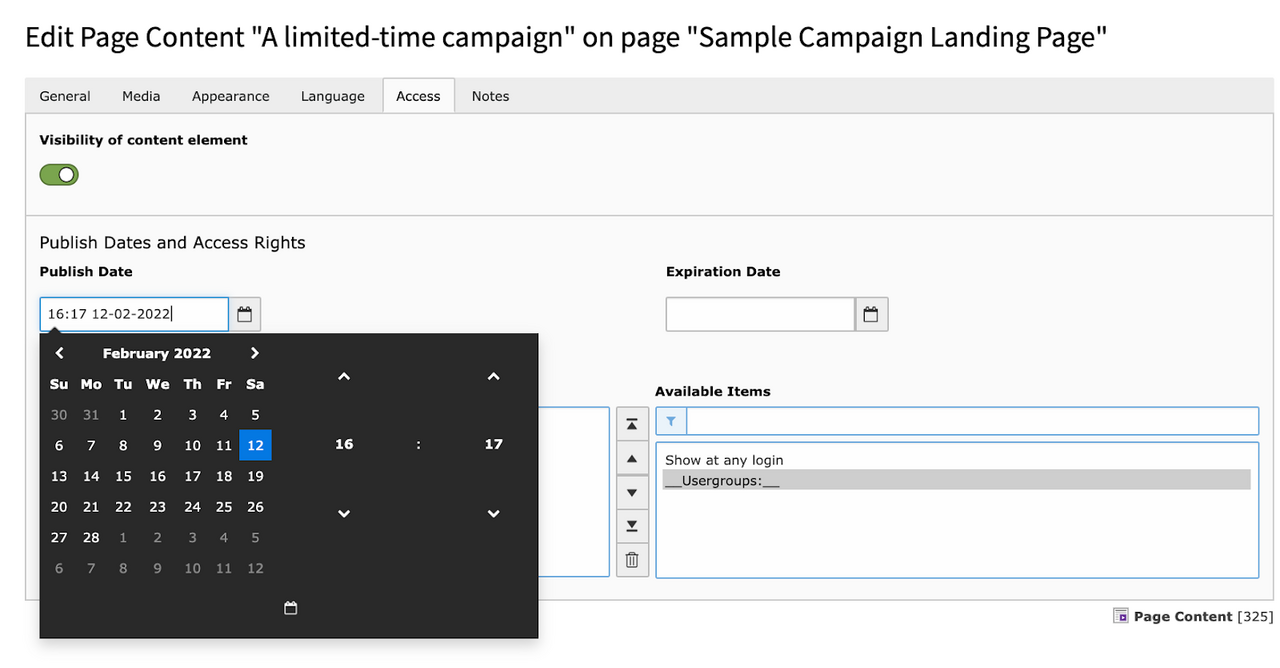
Just as you can set the visibility, publish date, and expiration date for pages you can set the same properties for content elements like the “text and media” content element on the campaign page above. In this example, I’ve set the content element’s publish date for a point in the future.
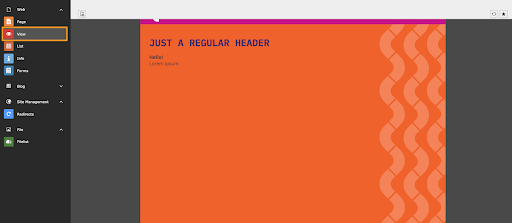
When I preview the page again it looks like this, because the campaign content is now hidden until a later date (though it looks a bit boring, now, I’ll admit).
While reviewing a page, icons will visually indicate whether content elements are visible or scheduled. The clock icon in the example below shows that a piece of content is scheduled for a date in the future.
If a content element’s visibility is turned off, a round red icon will appear in the top left corner.
Set page and content access rights for specific user groups
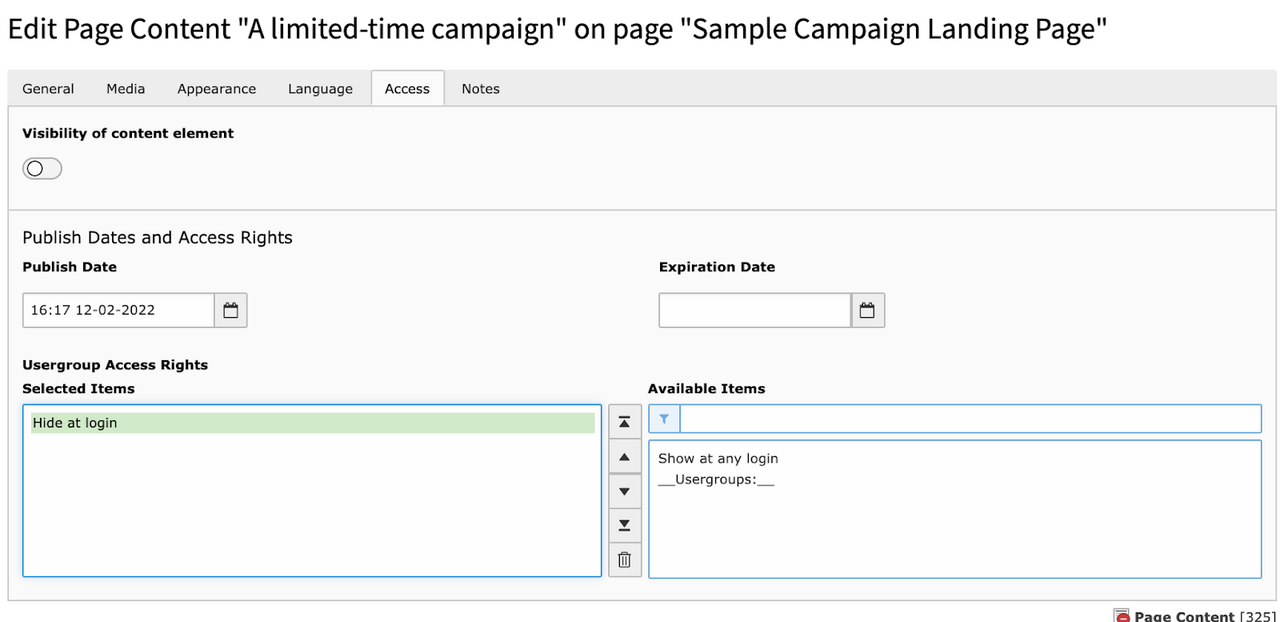
Depending on what kind of website you run, you might have large amounts of “member-only content” including personalized greetings, profile pages, or information that one must be logged-in to access. In TYPO3 you can create user groups to determine who can access different content. You can decide if a user group can access a page or content element by moving any group from the “Available Items” column into the “Selected Items” column in the Usergroup Access Rights section at the bottom of the “Access” tab.
TYPO3 has two default “groups”:
- Hide at login: set a page or element to “visible” only when a user is not authenticated (e.g., a link to “log in”)
- Show at any login: set for elements that require authentication to access, but is okay for groups to see (e.g., a link to a member’s only page)
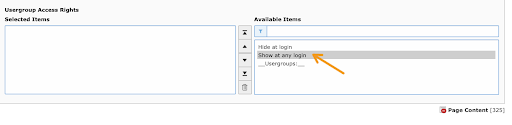
To add a restriction, select any item in the “Available Items” column. It will move to “Selected Items” when you click on it.
To delete restrictions, highlight a user group in the “Selected Items” column and click the trash icon in between the two columns.
Schedule yourself some rest & relaxation
One of the great benefits of TYPO3’s auto-publishing workflow is that you can plan ahead for your content. For people who are managing multiple pages or campaigns, this takes a lot of stress out of project management. You can set schedule dates as you create content without worrying about hitting a publish or unpublish button at a specific time.
Curious about what else TYPO3 has to offer? Join our discussions and ask questions on Slack!

Comments

A big feature is missing. Ability to modify a page and schedule the mods to be published at a later time.
Great article for great features. Maybe also good to add that TYPO3 can handle 403 errors when a user tries to access a hidden page.